Order Online or Call Now +92 300 0728887

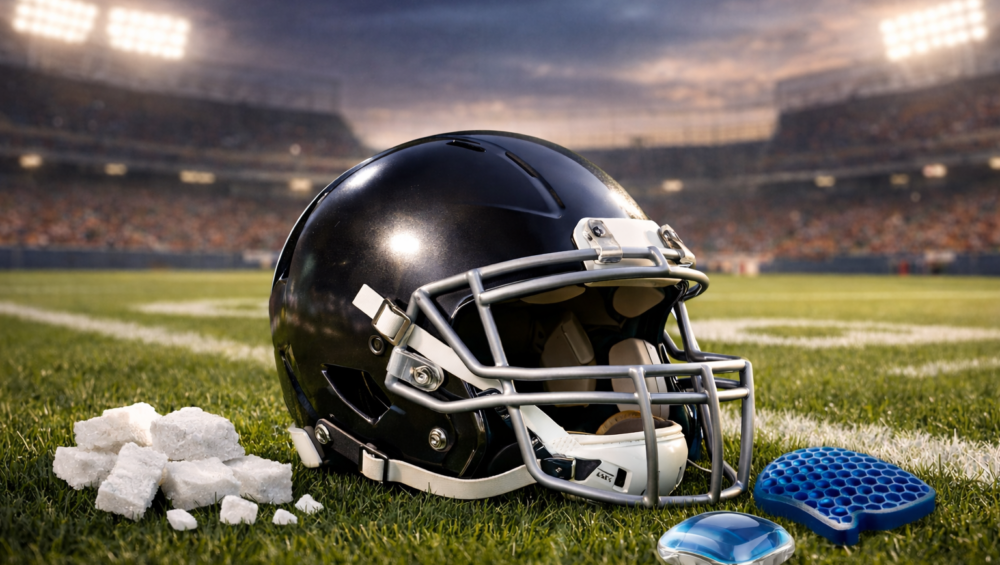
Modern football helmet on grass field

The Materials Used in Football Helmets

Have you ever wondered what keeps a football player’s head safe during a hard hit? Many people see the helmet but do not realize that the material used in football helmets is responsible for players’ safety. It is not just hard plastic. Instead, it is made from many strong and smart materials. 

Football is a fast and physical game. Players run, jump, and crash into each other. Because of this, head protection is very important. Over the years, helmet design has improved a lot. New materials are now lighter and stronger. Let’s explore more about the materials used in football helmets.

History of Football Helmets

Time PeriodMain Material UsedNew Technology AddedSafety Improvement
1920s – 1940sSoft Leather HelmetsBasic padded head straps insideVery little protection, and it  prevented small cuts
1950s – 1970sHard Plastic Shells (ABS)Suspension systems and face masksGreatly reduced skull fractures
2000s – 2020sAdvanced Composite Materials and TPUTPU padding and 3D lattice designsHigher protection and better shock control

Components of a Modern Football Helmet

Outer Shell

Polycarbonate Shell

Most football helmets use polycarbonate plastic. This material is very strong but still light. It spreads the force of hits over a wide area. Polycarbonate also resists cracking. It works well in hot or cold weather. It can be shaped to fit the head comfortably. 

Advanced Composites

Some modern helmets use advanced composite materials. These are mixtures of plastics and fibers. They help reduce weight without losing protection. Advanced composites also absorb impact better. Because of this, the head is safer from strong hits. Players feel less neck strain because the helmet is lighter. 

Inner Materials

Expanded Polystyrene (EPS) Foam

EPS foam is inside the helmet under the shell. It is light but strong. When a player is hit, EPS compresses. This absorbs energy from the hit and reduces force reaching the brain. EPS foam is also inexpensive and easy to replace, making it practical for schools and leagues that need cost-effective safety solutions.

Vinyl Nitrile Foam Padding

Vinyl nitrile foam is softer than EPS. It adds comfort and extra shock absorption. It is flexible and returns to its shape after pressure. This material helps the helmet fit snugly on the head. This foam also reduces fatigue, because players feel less pressure on the top and sides of their heads.

TPU Cushioning (Thermoplastic Polyurethane)

TPU is used in modern helmets as small soft pods or columns. It is strong but flexible. TPU absorbs energy from hits and spreads it across the head. It works well in hot and cold weather. TPU cushions are lightweight, providing improved protection without making the helmet heavy.

Air Bladder Systems

Air bladders are small pockets filled with air inside helmets. Players can adjust the air to make the helmet fit better. The air pockets also help absorb shocks. When a hit happens, the air spreads the force. This reduces pressure on one spot and allows players to fine-tune the helmet before each game. 

Face Mask (Steel or Titanium)

The face mask protects the face from hits. Most face masks are made from steel. Steel is strong and durable. It can handle heavy impacts. However, steel is heavier than some other metals. Some high-level helmets use titanium face masks. Titanium is lighter than steel but still very strong. As a result, players can move faster. 

Chin Strap Materials

The chin strap keeps the helmet in place. It is usually made from strong nylon straps. The cup part may be made of plastic and foam. Soft padding on the chin cup adds comfort. Strong buckles keep everything locked. Therefore, the chin strap material plays a key role in keeping the helmet stable.

Inner Liner Fabric

Inside the helmet, there is also a fabric lining. This fabric touches the player’s head. It is usually soft and moisture-wicking. That means it pulls sweat away from the skin. Because of this feature, the head stays cooler and drier. Some liners are removable and washable. So, they are easy to clean.

Shock Absorbing Gel Inserts

Some helmets use gel inserts. These are small pads filled with special gel. The gel moves when hit. This movement helps absorb impact energy. Gel inserts can handle repeated impacts. They also provide a soft feel. In addition, gel helps spread force evenly. So, it reduces pressure on one point. 

Carbon Steel Hardware

Helmets have screws and clips. These are often made from carbon steel. Carbon steel is strong and long-lasting. It holds the face mask and other parts in place. If the hardware is weak, the parts may loosen. Therefore, strong metal hardware is important. 

Anti-Microbial Coatings

Some helmets include anti-microbial coatings. These coatings help stop bacterial growth. Because players sweat a lot, helmets can become damp. Bacteria can cause bad smells and skin problems. However, anti-microbial materials reduce this risk. 

Paint and Protective Coatings

The outside of the helmet is painted. This paint is not just for looks. It also adds protection. Special coatings protect the shell from scratches and sun damage. Sunlight can weaken plastic over time. However, protective layers help prevent this. 

Conclusion


The Materials Used in Football Helmets work together to protect players on the field. Each material has a special job. Modern helmets use smart design and strong materials. Because of this, players are safer than before. However, proper fit and care are also important. When all parts work together, the helmet gives the best protection. 

FAQs

1. What is the outer shell of a football helmet made of?

Most outer shells are made from strong polycarbonate plastic.

2. Why is foam important inside the helmet?

Foam absorbs shock and reduces the force of impacts.

3. Are lighter helmets safer?

Lighter helmets can improve comfort. However, safety depends on design and materials.

4. What is TPU in football helmets?

TPU is a flexible material that absorbs impact and lasts long.

5. Why are chin straps important?

Chin straps keep the helmet secure and prevent movement during play.
How to Break in Football Cleats

How to Break in Football Cleats

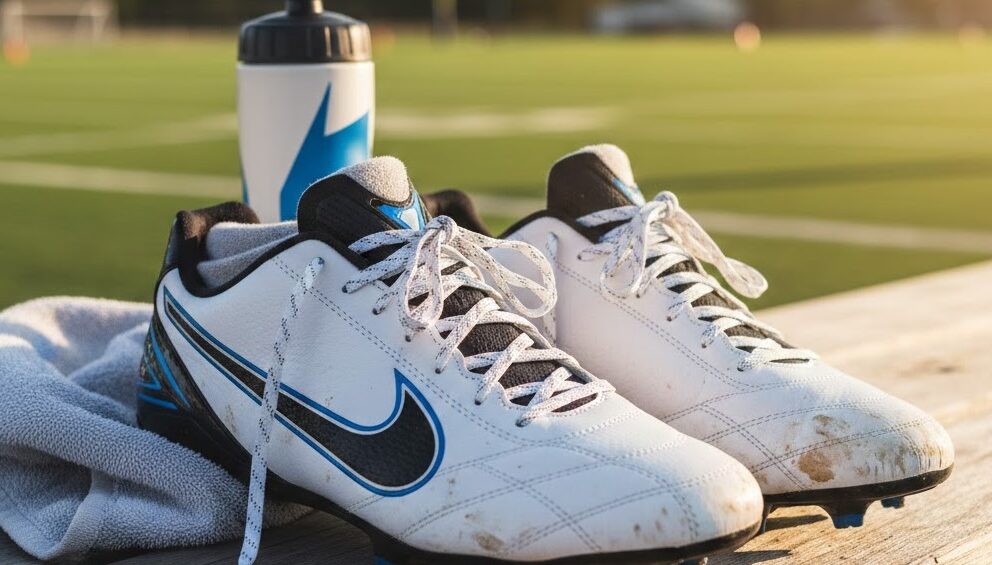
How to Break in Football Cleats the right way can save your feet from pain. How to Break in Football Cleats is something every football player should learn before game day. Have you ever worn new football cleats and felt tightness or pain? Do your heels hurt or your toes feel squeezed? If yes, you are not alone. New cleats often feel stiff and hard at first. They are not ready for long practice or big matches. That is why breaking them in is very important. When you break in your cleats slowly and safely, they become softer. They start to shape around your feet. Then you can run faster, cut better, and play with more comfort.

Many players make mistakes. They wear new cleats in a full game without testing them first. As a result, they get blisters and sore feet. However, you can avoid this problem. You just need the right steps and some patience. In this guide, you will learn simple and easy ways to break in your football cleats. The steps are safe and helpful. So, let’s begin and protect your feet the right way.

Why Breaking in Football Cleats Is Important

New football cleats are usually stiff. The material is strong and tight. This helps with support and grip. However, at first, they do not match the shape of your feet. Because of this, you may feel pressure on your toes, heels, or sides. If you ignore this problem, you may get blisters. You may also get small cuts or foot pain. Therefore, breaking in your cleats is very important. It helps the shoes become softer and more flexible.

When cleats fit well, your game becomes better. You can run faster. You can turn quickly. You feel balanced and strong. On the other hand, tight cleats can slow you down. They can distract you during play. Also, poor fitting shoes can cause long-term foot problems. For example, you may feel heel pain or arch pain. That is why you must take time to break them in. Slowly wearing them helps the material stretch a little. Over time, they mold to your feet. As a result, you feel more comfort and confidence on the field.

Choose the Right Size Before Breaking Them In

First of all, you must choose the correct size. If your cleats are too small, breaking them in will not fix the problem. They will always feel tight. On the other hand, if they are too big, your feet will slide inside. This can cause blisters. Therefore, picking the right size is the first and most important step. Your toes should not touch the front too hard. Also, your heel should stay in place when you walk.

Moreover, try your cleats with football socks. Thick socks can change the fit. So, always test them while wearing the same socks you use in games. Walk around the store or your home. Check for tight spots. If you feel sharp pain, choose another size. It is better to change size early than suffer later. In short, the right size makes breaking in much easier and safer.


Wear Them at Home First

After buying your cleats, do not rush to the field. Instead, wear them at home. This is a safe and easy step. Walk around your house for 20 to 30 minutes. Sit, stand, and move a little. This helps the shoes bend naturally. At the same time, your feet start adjusting slowly.

Also, wearing them at home helps you find problem areas. For example, you may feel pressure on your heel or little toe. If that happens, you can fix it early. You can adjust the laces or wear thicker socks. Because you are indoors, the cleats will stay clean. So, you can still return them if needed. Therefore, always start small. Home practice is a smart first step.


Use Thick Socks for Extra Protection

Thick socks are very helpful during the break-in period. They add extra padding between your skin and the shoe. As a result, they reduce friction. Less friction means fewer blisters. This is very important in the first few days.

In addition, thick socks help stretch the cleats slightly. When you wear them, the inside of the shoe opens up a bit more. Over time, the material becomes softer. However, do not wear socks that are too thick. Your feet still need space to move. Choose good-quality sports socks. This simple step can make a big difference.

Read more: Leepa Paddles


Practice in Short Sessions

Next, start practicing in short sessions. Do not wear new cleats for a full two-hour practice. Instead, wear them for 20 to 30 minutes first. Then slowly increase the time each day. This allows your feet to adjust slowly.

If you feel pain, stop and rest. Do not ignore foot pain. It is a warning sign. By taking small steps, you protect your feet. Also, your cleats get time to soften naturally. In this way, you avoid sudden injuries. Step by step, your shoes will feel more comfortable.


Loosen and Adjust the Laces Properly

Laces play a big role in comfort. If they are too tight, your feet may feel squeezed. If they are too loose, your foot may slide. Therefore, always adjust your laces carefully. Make sure they feel snug but not tight.

Also, you can try different lacing styles. Some styles reduce pressure on the top of your foot. Others give more space near the toes. Small changes can improve comfort a lot. So, take time to test and adjust. Proper lacing helps your cleats fit better during the break-in period.


Gently Flex the Sole

New cleats often have stiff soles. Because of this, running may feel hard at first. To fix this, gently bend the sole with your hands. Do not force it too much. Just press lightly to make it more flexible.

You can also walk on grass to help the sole bend naturally. However, avoid bending it too hard. Too much force can damage the shoe. Gentle movement is enough. Over time, the sole will become more flexible. Then your steps will feel smoother and easier.


Use Warmth Carefully

Warmth can help soften materials like leather. For example, wearing your cleats in warm weather can help them adjust faster. Your body heat also helps shape the inside.

However, never use direct heat like a heater or dryer. Too much heat can damage the shoe. It can weaken glue and stitching. Instead, let warmth happen naturally. Patience is safer than quick fixes. Slow changes protect both your cleats and your feet.


Protect Your Feet from Blisters

Blisters are common with new cleats. Therefore, prevention is very important. You can use blister pads on problem areas. You can also apply foot tape. These simple steps reduce rubbing.

In addition, keep your feet dry. Wet skin gets blisters more easily. Change socks if they get sweaty. Also, trim your toenails. Long nails can press against the shoe and cause pain. Small habits can protect your feet greatly.


Keep Your Cleats Clean and Dry

Taking care of your cleats helps them last longer. After practice, clean off dirt and mud. Then let them dry naturally. Do not place them under strong heat.

When cleats stay clean, the material stays strong. Wet shoes can become hard and stiff again. Therefore, always store them in a cool, dry place. Good care keeps them comfortable for many games.


Be Patient During the Process

Breaking in cleats takes time. It does not happen in one day. Some players need a week. Others may need two weeks. That is normal.

Do not rush the process. If you try to speed it up, you may hurt your feet. Instead, follow simple steps and stay patient. Slowly, your cleats will feel like part of your feet. Then you will feel ready for big matches.


Signs Your Football Cleats Are Fully Broken In

How do you know when your cleats are ready? First, they should feel soft and flexible. You should not feel tight spots. Also, your feet should not hurt after practice.

Another sign is smooth movement. You can run, turn, and stop easily. There is no rubbing or slipping inside. When you feel comfort and control, your cleats are ready. At this point, you can trust them during important games.


Conclusion

How to Break in Football Cleats is simple when you follow the right steps. How to Break in Football Cleats takes time, care, and patience.

In the beginning, new cleats may feel tight and uncomfortable. However, with slow practice and smart steps, they become soft and flexible. Always start at home. Wear thick socks. Practice in short sessions. Also, protect your feet from blisters. Most importantly, be patient. When your cleats fit well, your game improves. You feel confident and strong. So take care of your feet, and enjoy every match.


FAQs

1. How long does it take to break in football cleats?
It usually takes one to two weeks. However, it depends on the material and how often you wear them.

2. Can I use water to break in cleats?
It is not recommended. Water can damage the material. It is better to break them in slowly by wearing them.

3. Should cleats feel tight at first?
They may feel slightly snug. However, they should not cause strong pain. If they hurt a lot, the size may be wrong.

4. Can I wear new cleats in a game?
It is better not to. First, wear them in practice. Make sure they feel comfortable before using them in a match.

5. How can I stop blisters while breaking in cleats?
Wear thick socks, use blister pads, and keep your feet dry. These steps help protect your skin.

How to Make Football Gloves Sticky for Better Grip?

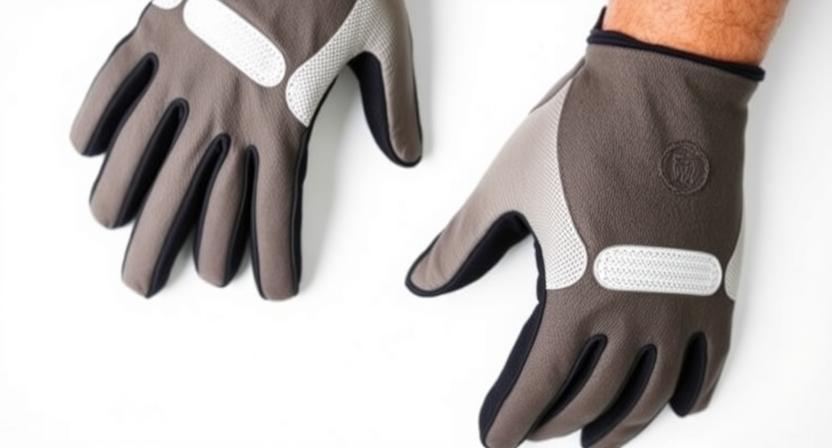
Have you ever missed an easy catch and felt confused about why the ball slipped out? How to Make Football Gloves Sticky for Better Grip is a question many football players ask when their gloves stop working like before.

Football gloves play a very important role in the game. They help players catch the ball with confidence. They also help control the ball during fast plays. Over time, gloves lose their stickiness. This happens because of sweat, dirt, weather, and regular use. When gloves lose grip, players lose confidence. Missed catches increase. Performance drops. This can affect the whole team.

The good news is that grip loss does not always mean you need new gloves. Many simple methods can bring grip back. These methods are easy. They are affordable. Anyone can do them. In this guide, everything is explained step by step. The language is simple. The ideas are clear. If you follow this guide, your gloves can feel sticky again and help you play better.

Why Football Gloves Lose Their Grip

Football gloves lose grip mainly because of dirt and sweat. When you play, sweat from your hands moves into the glove surface. Over time, this sweat dries and leaves salt behind. This salt blocks the sticky layer of the gloves. Dirt and dust also stick to the glove palms. This creates a thin layer that stops the gloves from gripping the ball properly.

Weather is another big reason. Rain makes gloves wet and slippery. Sun dries them out and makes the material hard. Cold weather reduces flexibility. With repeated use, the grip layer slowly wears down. The surface becomes smooth instead of tacky. Even the best gloves face this problem after many games.

Understanding why grip fades is very important. When you know the cause, you can fix it the right way. This helps you choose the best solution. It also helps you protect your gloves for a longer time.

Clean Your Football Gloves Properly

Cleaning is the most important step to restore grip. Dirty gloves cannot be sticky. Start by using clean, cold water. Lightly wet the glove palms. Use your fingers to gently rub the surface. This helps remove dirt, dust, and dried sweat. Be gentle. Hard scrubbing can damage the grip layer.

After cleaning, rinse the gloves well. Soap or dirt left behind can reduce grip. Let the gloves air dry naturally. Place them flat in a cool place. Do not use heat. Do not place them in direct sunlight. Heat can damage the sticky surface and make gloves stiff.

Regular cleaning keeps gloves fresh and effective. Clean gloves grip the ball better. They also last longer. This simple habit improves performance and saves money.

Use Water to Activate Grip During Play

Water is one of the easiest ways to improve glove grip. Light moisture activates the sticky surface of football gloves. Before a play, lightly splash water on the palms. Some players use a spray bottle. Others lightly spit on the gloves. Rub palms together to spread moisture evenly.

The key is balance. Too much water makes gloves slippery. Too little water does not activate the grip. Light moisture works best. Many professional players use this method during games. It is quick and effective.

Water is free and always available. It is best for short-term grip improvement. Use it often during games to keep gloves sticky.

Use Football Glove Grip Sprays

Grip sprays are designed to add tackiness to football gloves. These sprays are easy to use. Spray a small amount on the glove palms. Rub gently. Let it dry for a few seconds before play.

Grip sprays work well for older gloves. They help restore grip quickly. Many players carry them in their gear bag. They are helpful during practice and games.

Do not overuse spray. Too much can make gloves stiff and uncomfortable. Always follow the instructions. When used correctly, grip sprays improve control and confidence.

Wash Gloves the Right Way

Washing gloves deeply cleans the grip surface. Use mild soap and cold water. Hand wash only. Machine washing can damage the gloves. Gently rub the palms to remove sweat and dirt.

Rinse thoroughly. Soap residue can reduce grip. After washing, lay gloves flat to dry. Do not twist or squeeze them. This keeps their shape and grip intact.

Washing gloves every few weeks keeps them in good condition. Clean gloves perform better and feel more comfortable.

Use Tacky Products Carefully

Some players use tacky gels or grip wax. These products add extra stickiness. Always check league rules before using them. Some leagues ban certain substances.

Apply a very small amount. Spread it evenly. Test grip before play. Too much tack can feel sticky in a bad way. It can also attract dirt faster.

When used carefully, tacky products are helpful. They work well in rain or cold weather.

Avoid Harsh Chemicals

Harsh chemicals damage football gloves. Avoid bleach, alcohol, and strong cleaners. These break down the grip layer. Once damaged, the grip cannot be restored. Always use mild soap and water. Gentle care keeps gloves usable longer. Simple care prevents permanent damage.

Store Gloves the Right Way

Storage affects glove grip. Always let gloves dry after use. Never store them wet. Moisture causes damage and a bad smell. Store gloves flat in a cool, dry place. Do not fold palms together. This prevents sticking and tearing. Good storage keeps gloves ready for the next game.

Lightly Moisten Gloves Before Games

Before games, lightly dampen gloves. This activates the grip. Rub palms together evenly. This step prepares gloves for action. Many players do this before kickoff. It helps catches feel secure. Avoid soaking gloves. Light moisture works best.

Know When Gloves Are Too Old

Some gloves cannot be fixed. If the grip surface is smooth or cracked, replacement is needed. No method will fully restore grip. Check gloves often. When the grip stays weak after cleaning, it may be time to replace them. Using worn gloves reduces performance.

Build Good Glove Care Habits

Good habits extend glove life. Clean gloves often. Store them properly. Avoid unnecessary dirt contact. Use gloves only during play. Do not wear them off the field. Small habits create a long-lasting grip.

Improve Grip with Proper Catching Technique

Grip is not only about gloves. Technique matters. Proper hand position helps control the ball. Practice catching drills. Use the correct form. Strong technique supports glove grip. Together, skill and equipment improve performance.


Conclusion

Understanding How to Make Football Gloves Sticky for Better Grip helps players perform with confidence and control. Clean your gloves regularly. Use water wisely. Store them correctly. Use grip products carefully. Combine good habits with proper technique. With these steps, your gloves will stay sticky longer and help you play your best game.


FAQs

How often should I clean football gloves?
After every few games or heavy use.

Does water really help grip?
Yes. Light moisture activates the grip.

Are grip sprays safe?
Yes, if used properly.

Can old gloves regain grip?
Sometimes, but very worn gloves need replacement.

Should I machine wash gloves?
No. Always hand wash.

Select the fields to be shown. Others will be hidden. Drag and drop to rearrange the order.
  • Image
  • SKU
  • Rating
  • Price
  • Stock
  • Availability
  • Add to cart
  • Description
  • Content
  • Weight
  • Dimensions
  • Additional information
Click outside to hide the comparison bar
Compare
Shopping cart close